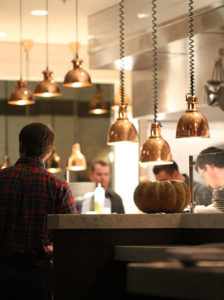
Tyler Florence’s Rotisserie & Wine | Napa

Duck Confit and Waffles at Rotisserie and Wine in Napa

CLOSED 2012

 
It’s no secret that Food Network celebrity and culinary prowess usually have an inverse relationship. Most of the true heavy-hitters were thrown overboard long ago, cast into the backwaters of basic cable or pushed into the early-morning lineup. They weren’t camera friendly, used complicated ingredients and made dishes that took more than 30 minutes. God forbid.
Tyler Florence has always been the exception. With his dude-ish affability, lack of shtick and uncomplicated affection for the kinds of people actually like to eat, he is a chef’s chef with proletariat cred. And his new Napa restaurant, Rotisserie and Wine, is very much a restaurant for the people.
It’s been a busy year for Florence. R&W is his second Bay Area to restaurant to open in 2010. San Francisco’s Wayfare Tavern opened in November and he plans to open El Paseo, with rocker Sammy Hagar later this year. He has also opened two kitchen stores (in Napa and Mill Valley).
With such a whirlwind schedule, it would be all to easy to phone in Rotisserie and Winea fast-casual concept restaurant focused on rotisserie meats and Southern-influenced sides. Instead, Florence over-delivers with a spot-on line-up of dishes that makes decision-making downright difficult. Fortunately prices are reasonable enough for excessive generosity…

Scrapple at Rotisserie and Wine

Menu Bests =

Cheese Puffs ($3 each): Bacon mornay and melted cheese ooze from a cocoon of fried dough.
Fried Scrapple ($5): Don’t ask what it is. Servers have been carefully trained to dance around the fact that scrapple is, in fact, everything but the squeal. Offal, scraps and other goodies are mixed with cornmeal and fried. Think of it as a piggy hush puppy.
Duck Confit Waffles ($18): Chicken and waffles gets a Napa twist with fried duck confit, quince soffrito and endive served atop fluffy waffles and maple syrup. Unforgettable.
Beef & Bones ($28): Prime rib eye steak, bread-crumb topped bone marrow and Yorkshire pudding. Watery horseradish needs work, but it’s a small complaint between mouthfuls of perfectly-cooked beef.
Whipped yams with banana ($5): Pureed yams meet match with a hint of banana vinegar, yogurt and crispy yam skins.
David Little’s Potatoes ($7): Baby ‘taters soaked in rotisserie drippings. Schmaltz-tastic.
Cookies and milk: On the “glad we asked” list, this kindergarten favorite includes warm ginger snaps and a bacon-fat infused shortbread as heavenly to smell as it is to eat. On the side, malted panna cotta.
Dark and Stormy: Rum ice cream, ginger beer and lime.
The Vibe: Cracker Barrel meets Pottery Barn. In a good way. There’s a homey mix-matchiness, reclaimed wood, lots of jars and the staff in checkered shirts and jeans. But way before it gets too hoedown, Rotisserie and Wine remembers where it is (Napa’s Riverfront) and classes it up with rural/urban-minimal touches (concrete flooring, wine barrel chandeliers) and reigns it all in.
The Scene: An open kitchen and bar runs nearly the length of the restaurant, making it friendly to single diners and cocktailers. The price-point and menu makes it plenty friendly for kids and families.
The Drinks: A rotating lineup of syrups mixed with soda or sparkling wine are refreshing starters. Beet syrup isn’t quite as alarming as it sounds. Plenty of local and not-so-local wines by the bottle or glass. Anthill Farms syrah shows someone’s paying attention.
The Cost: Two “snacks”, two appetizers, two sodas, two glasses of wine, one entree (suggested for two), two sides and two desserts for a relatively thrifty (for Napa) $136.
Rotisserie and Wine, 720 Main St., Napa, 254-8500. Open nightly from 5pm to 11pm. Lunch anticipated in the coming months. Closed Dec. 24/25/31.

Aunt Ellie’s Lemon Bars | Holiday Cookies

These easy-to-make lemon bars are a crowd-pleaser with their bold flavor, citrusy aroma and light crust.

Aunt Ellie’s Lemon Bars

For the crust:
•       1 pkg lemon cake mix
•       1/3C canola oil
•       1 egg
•       zest of 1 lemon
For the filling:
•       8oz pkg cream cheese (softened)
•       1/3C sugar
•       zest of 1 lemon
•       3TBSP lemon juice
•       1 egg
Directions
Preheat oven to 375. Mix the crust ingredients together until crumbly then set aside 1 cup of the mixture. Lightly pat the remainder in a glass baking dish (approx 11”X13”). Bake for 15 minutes. Meantime mix the sugar and cream cheese til well blended. Add the remaining filling ingredients and mix well. Spread the filling on the baked crust and sprinkle the cup of remaining crust mix on top. Bake for 15 minutes more. Cool and cut into small squares. Refrigerate until served.

Sebastopol Applesauce Cookies

A healthier take on holiday cookies, this recipe doesn’t use butter — substituting applesauce and a bit of oil. It also incorporates whole wheat flour for a hearty, cake-like drop cookie. I think it would be great to add some dried apples or raisins to the recipe for some added intrigue.
“This recipe came about by my experimenting to get the same flavor as Twin Hill Apple Farm’s Apple Bread that they have at their farm in Sebastopol.” — Maria Ferjancsik

Sebastopol Applesauce Cookies

2 cups whole wheat flour
1 cup sugar
1 cup smooth applesauce
½ cup oil
2 eggs
1 teaspoon cinnamon
1 teaspoon ground cloves
1 teaspoon vanilla
½ teaspoon salt
1 teaspoon baking soda
½ teaspoon baking powder
Cinnamon sugar for top of cookies:
¼ cup sugar
1 teaspoon cinnamon
Preheat oven to 350 degrees.  Sift together whole wheat flour, cinnamon, cloves, salt, baking soda, and baking powder.  In separate bowl, mix together sugar, applesauce, oil, eggs, and vanilla.  Add flour mixture to applesauce mixture, stirring well to combine.  Take walnut-sized spoonfuls of batter and place on ungreased baking sheets, leaving 1-2 inches between cookies.  Flatten slightly with a spoon.  Combine ¼ cup sugar with 1 teaspoon cinnamon and sprinkle each cookie generously with cinnamon sugar.  Bake 10-14 minutes in oven.  Let cool 10 minutes on baking sheets before moving to wire wracks to cool completely.

Brown Butter Spoon Cookies | Holiday Cookies

These are amazing little shortbread-like cookies that get better after a few days. The brown butter gives them a nutty, rich flavor and little flecks of brown in the final cookies. This recipe, from Heather Leidner, originally ran in Gourmet magazine and has been tweaked for her family.

Brown Butter Spoon Cookies

  • 2 sticks (1 cup) cold unsalted butter, cut into pieces
  • 3/4 cup sugar
  • 2 teaspoons vanilla
  • 2 cups all-purpose flour
  • 1 teaspoon baking soda
  • 1/8 teaspoon salt, slightly rounded
  • 1/3 cup fruit preserves (your choice, I love strawberry and blackberry)
Make dough:
Fill kitchen sink with about 2 inches of cold water. Melt butter in a 2- to 3-quart heavy saucepan over moderate heat and cook, stirring occasionally, until butter turns golden with a nutlike fragrance and flecks on bottom of pan turn a rich caramel brown, 10 to 12 minutes. (Butter will initially foam, then dissipate. A thicker foam will appear and cover the surface just before butter begins to brown; stir more frequently toward end of cooking.) Place pan in sink to stop cooking, then cool, stirring frequently, until butter starts to look opaque, about 4 minutes. Remove pan from sink and stir in sugar and vanilla.

Whisk together flour, baking soda, and salt in a small bowl and stir into butter mixture until a dough forms. Shape into a ball, wrap with plastic wrap, and let stand at cool room temperature 1 to 2 hours (to allow flavors to develop).
Form and bake cookies:
Put oven rack in middle position and preheat oven to 325°F.
Press a piece of dough into bowl of teaspoon, flattening top, then slide out and place, flat side down, on an ungreased baking sheet. (Dough will feel crumbly, but will become cohesive when pressed.) Continue forming cookies and arranging on sheet. Bake cookies until just pale golden, 8 to 15 minutes. Cool cookies on sheet on a rack 5 minutes, then transfer cookies to rack and cool completely, about 30 minutes.
Assemble cookies:
While cookies cool, heat preserves in a small saucepan over low heat until just runny, then pour through a sieve into a small bowl, pressing hard on solids, and cool completely.
Spread the flat side of a cookie with a thin layer of preserves. Sandwich with flat side of another cookie. Continue with remaining cookies and preserves, then let stand until set, about 45 minutes. Transfer cookies to an airtight container and wait 2 days before eating.

Oatmeal Chocolate Chip Waffle Cookies | Holiday Cookies

These are amazingly fast and easy to make. They’re best still warm.

Crispy Oatmeal Chocolate Chip Waffle Cookies

Makes 24
1/2 cup butter (1 stick) melted
1/2 cup, plus 2 T light brown sugar
2 large eggs, room temp
2 t vanilla extract
3/4 cup flour
1/2 t baking soda
1/4 t salt
1 1/2 cups old fashioned rolled oats (not instant)
1 1/4 cups chocolate chips
Coat a waffle iron with cooking spray and heat to med high.
In large bowl whisk the butter and sugar until smooth. Whisk in the eggs and vanilla.Stir in the flour,baking soda, and salt, mix until well combined. Add oatmeal and chocolate chips, stirring until combined. Batter will be thinner than regular cookie dough.
Use a tablespoon or small ice cream scooper to portion out a cookie on each square. You don’t want to fill up the whole square. A tablespoon is just about the right amount! Close the lid. cook until brown, about 2 to 3 minuets. Use a thin metal spatula to remove them and place on parchment paper to cool.

Chocolate Shadow Peanut Butter Cookies | Holiday Cookies

As a group, we were split on these. Some of us loved the peanut buttery goodness. Others weren’t too sure about the mix of peanut butter, chocolate and peppermint. A cookie’s a cookie, though, and they got eaten up quickly nonetheless.

Chocolate Shadow Peanut Butter Cookies

Submitted by Karen Hagar
1 1/2 cup(s) on natural crunchy or creamy peanut butter
1 cup(s) packed light-brown sugar
1/2 cup(s) (1 stick) softened unsalted butter
1 large egg
1 1/2 cup(s) all-purpose flour (spooned and leveled)
1 teaspoon(s) baking powder
½ to ¾ cup of semi-sweet or any type of dark chocolate – chocolate chips (the amount will vary as it depends how much chocolate you’ll want in the batter)
¼ to ½ tsp of peppermint extract
Raw or fine sugar (optional)
——————————————————————————–
Directions
Preheat oven to 350 degrees. In a medium bowl, whisk together flour and baking powder; set aside.
In a large bowl, beat peanut butter, sugar, and butter until smooth. Beat in egg. Gradually add flour mixture, beating to combine.
Melt the the chocolate and add the peppermint. Swirl into the cookie batter.
Pinch off dough by the tablespoon; roll into balls; roll in sugar, if using. Place 2 inches apart on parchment-lined baking sheets. Using a fork, press balls in a crisscross pattern, flattening to a 1/2-inch thickness.
Bake cookies, rotating halfway through, until lightly golden, 18 to 22 minutes.
Cool cookies on a wire rack. Store in an airtight container at room temperature up to 1 week.

Minty Chocolate Sandwich Cookies | Holiday Cookies

These are both adorable and tasty. The chocolate cookies have a nice little snap, and who can resist a buttery peppermint cream filling? You can dial down the minty-ness by only using a teaspoon or so, but personally, I love the cool flavor. If you’re feeling extra festive, roll the cookies in crushed candy canes around the edges.

Minty Chocolate Sandwich Cookies

Submitted by Donna Williamson
4 cups all-purpose flour
1 1/3 cups unsweetened cocoa powder (I use Ghirardelli)
2 tsp. espresso powder
1/2 tsp. salt
1 1/2 cups butter, softened
1 1/2 cups sugar
2 eggs
Peppermint Cream Filling
1 cup butter, softened
2 tsp vanilla
2 tsp peppermint extract
5 cups powdered sugar, divided into 2 – 2 1/2 cup portions
2 Tbsp milk
Directions
In a large bowl, stir together flour, cocoa powder, espresso powder, and salt; set aside
In a very large mixing bowl, beat butter with an electric mixer on medium to high speed for 30 seconds. Add sugar. Beat until combined, scraping sides of bowl occasionally. Beat in eggs until combined. Beat in as much of the flour mixture as you can with the mixer. Using a wooden spoon, stir in any remaining flour mixture. Divide dough in half. If necessary, cover and chill for 1 to 2 hours until dough is easy to handle.
Preheat oven to 350 degrees. On a lightly floured surface, roll half of the dough at a time until 1/4 inch thick. Using a 2 1/2 inch round cookie cutter, cut out dough. Place 1″ apart on a parchment-lined cookie sheet. Bake 10 to 12 minutes or until edges are firm. Transfer to a wire rack and let cool. Fill cookies with Peppermint Cream Filling. Chill at least one hour before serving. Store in the refrigerator up to 3 days.
Directions for Peppermint Cream Filling
In a large bowl, beat softened butter with an electric mixer on high speed until fluffy. Add vanilla and peppermint. Beat in 2 1/2 cups powdered sugar. Beat in milk. Add the rest of the powdered sugar and beat until smooth. Tint with green or red food coloring, if desired. If necessary beat in additional milk to make spreading consistency.

What Obama and Bush both know about wine

Chicken/egg, TV/commercial, show-me-yours/I’ll-show-you-mine; which came first, the food or the wine? In our house, such questions carry weight, a seriousness you might consider more properly reserved for electrocardiograms, or matters of national security. The thing of it is, in wine country, at least in the fractional hectare of the 707 area code delineated by our split-rail fence line, the ordinal structure of food vis-a-vis wine matters, not least because you’ll neither be fed nor drunk until we’ve settled the matter, and I seriously doubt that I’m alone in building menus around bottles at least as often as doing so conversely. To wit, another kid-friendly, three-ingredient meal in the works – Sunny Eggs with Crispy Polenta and Creamy Mushroom Sauce – designed specifically to pair with a wine that my wife adores and that Presidents Obama and Bush Jr uniquely agree upon, because it’s been spilled on the official tablecloths of Republican and Democratic White Houses alike…
But first, context is warranted: My wife is on what I can like to call a Chard bender, and the wine racks where we keep our whites look a bit like the maples of her youth come the first snows of November: You know that they were full only recently, you clearly remember seeing them shot through with color and promise, but all that stands in front of you today is dry wood and the lonely spaces in between. This is, to be clear, an issue of frequency, not of quantity, because my wife doesn’t really drink all that much. However, and here again I count my blessings, she is happy enough to drink small quantities frequently, thereby encouraging both my regular raids on the family cellar and my predilection for pigging, but also – when the Chard bender is in full effect – leading to Saharan absences of the one white varietal that will acceptably whet her cute little whistle.
Result: Me, along with my youngest daughter, the inimitable Miss Maggie, on a late afternoon restocking mission. I wanted to go to Alexander Valley, where we believe – heretically, to most of our Russian River Valley neighbors – some of the very finest Chardonnays in the New World are produced (I’ve posted on AV Chards here, here, and here). Unfortunately, my darling nina was not feeling well, so rather than strap her into the back of the car and drag her around the next valley over, we played turistas and tooled around the Healdsburg plaza, her with an organic chocolate frozen yogurt from Snow Bunny (outlandishly overpriced by the calorie, but healthy and delicious all the same), and me with a visit to one of my favorite makers of local Chardonnay, Ms Susie Selby of Selby Winery. Another very accomplished winemaker (Bill Parker, currently making outstanding wines for White Oak, and previously for Matanzas Creek and BR Cohn) once told me that Chardonnay, more than any other varietal, reflects the influence and intentions of the winemaker: Just as a great vineyard will display its terroir in the wine that it births, so too will a fine Chardonnay reflect the hand of its maker. This turns out to be great news for Chard drinkers, because it means that if you can find a winemaker whose style of Chardonnay agrees with you, you can pretty much stop worrying about the rest.
It also means I’m a regular at Susie’s tasting bar, because my wife and I share an affinity for her particular style of Chardonnay, somewhat unfashionable these days, defined by a dense core of fruit framed in toasty oak and featuring flavors like sweet butter, toasted coconut, and creme brulee. We’re much less keen on either the overtly tropical-almost sweet or the steely hard-almost austere styles that have become so much the rage in our Valley and down into the Central Coast, but Susie makes just the sort of Chard we love – from local fruit (one of her vineyards is across the street from our kids’ elementary school, an endearing factoid for me), using classical techniques and French oak barrels. Plus, we think it’s kind of cool to support female winemakers: Not only do women often have more refined palates than men but, like professional chefs, their presence in big-time wine making keeps growing, despite the inversely-stacked odds of an industry – not unlike the kitchen – steeped in generations of male jefes calling the shots.
The other really cool thing about Selby is that the White House Ombudsman regularly serves her Dave Selby Reserve Chardonnay at big-wig State dinners, and the menus are all over the tasting room walls. And, as I mentioned, this is not an Obama phenomenon, because the Ombudsman has been pouring Susie’s wines for at least two Administrations, and which probably says something profound about the ability of good wine to transcend poor politics. It also provides a serious tactical edge to the home cook who, like me, having already fallen in love with the wine, now needs to build a menu around it, because you get to steal ideas from the executive chef of the White House itself. Engage your mental palate and sip the wine while you peruse the menus, and I will assure you of this one thing: You will take the Chardonnay home, and you will almost surely try to cook something using scallops or corn to match.

Cut Your Carrots, Not Your Fingers

Culinary knife cuts / carrotsThere is an unavoidable tension between the desire to manipulate a carrot into uniform, rectangular shapes (including every culinary knife cut in the parallelepiped family, from the batonnet soldier awaiting its Ranch dressing destiny to the microscopically perfect brunoise at the bottom of a bowl of consomme), and the desire to keep one’s digits unbloodied and persistently attached to one’s hand without surgical assistance. This is, of course, a natural byproduct of the unstable equilibrium created by placing an essentially round object – unless we’re talking seriously pre-fabricated foodstuffs, carrots obviously begin life in the kitchen in approximately cylindrical form – atop the level plane of a cutting board, and subsequently applying extreme pressure over the diminutive surface area of a knife edge.
Imagine trying to log-roll while wearing hockey skates, or walk a balance beam in Roller Blades, and you’ll have some sense of what you’re asking of your knife skills when you maul a carrot, and an appreciation of why classically trained chefs insist on doing such things one way, and not another. For me, the proper dismembering of a carrot will always be linked inextricably with the classic Lobster Sauce Americaine, because when I was first taught to make this sauce – a truly extraordinary dish, and such an unbelievable, all-day sort of pain in the ass that I’ve been running scared of trying it again for nigh on a decade – I had to cut an allumette of carrots to go with some peas as an accompaniment. While it is certainly true that peas and carrots excel in conjunction with both the lobster meat and the sauce – the flavors meld, the colors pop, and the textural contrast adds interest – I can’t really say why this should be: The minutes it should take to cut some little matchsticks out of a carrot really have very little to do with the final dish, particularly when compared to the hours spent roasting shells, poaching roe, straining the sauce, and all the other jazz that truly define the final product. But food memory can be funny that way, and to this day I cannot cut a carrot without tasting Sauce Americaine; and wondering when I’ll muster the courage to make it again.
In any case, as with most fundamental kitchen tasks, we in the early 21st century have the considerable advantage of several hundred years worth of others’ hard-won experience: The right ratio for a custard or bread dough; the proper way to emulsify a sauce; the proportion of onion in a mirepoix; and how to cut rectangular shapes out of something that is round. The challenge is to keep the round thing from rolling around as you push your knife through it, because if it rolls, then that blade is going to end up somewhere other than in your food, and that usually means you. The solution is equally obvious: Make the round thing not-round by taking off one of its sides. Once this has been accomplished, lie the thing on its newly-flattened side and square off the other three sides, creating a 3D rectangle. From there, you can easily cut flat squares, long planks, thin (julienne) or thick (batonnet) sticks, and any size of cube (dice). Thus does the entire exercise reduce to one cut: You need to get that first side off, in one clean cut, without hurting yourself. (If you’re knife is dull, you will have a real problem – seriously, you need a really good edge to do this safely. But more on the importance of sharp knives in another post.) Decide on the final shape you want (plank, stick, or cube) and the size (fine, medium, large), and everything else is just the consistent replication of a simple pattern:

Cut into a rectangular block
Cut the carrot into a rectangular block

Cut the block into uniform planks

Cut the planks into uniform sticks

Cut the sticks into uniform cubes

A nearly perfect French fry, from the oven

Oven Roasted French Fries (Heston Blumenthal method)The extraordinary potato: A poisonous, inedible plant whose tuber provides one of the world’s most critical food sources and is equally at home in a Michelin-star kitchen as it is in a McDonald’s fry basket. whose Personally, I love potatoes. I mean, I really, really, love them. I could probably eat an entire meal consisting entirely of potatoes and enjoy it (at least, with enough fat and salt – one of the potatoes many desirable properties is its gustatory affinity for fat and salt). I love potatoes mashed, grated and fried into pancakes; diced and roasted as home fries; baked, oven-roasted, and, of course, deep-fried into French fries. Is there any food that is simultaneously simpler and more spectacular than a perfectly french-fried potato? I, for one, think not; but deep-frying at home is both suboptimally unhealthy, and more than a little dangerous, which is why I was so excited to discover that one can make exceptional fries in the oven (recipe & technique are described at the bottom of this post).
It is to the humble tuber’s credit that it remains edible, if perhaps not at the peak of flavor, days, weeks, even months after it is pulled from the ground; certainly, the ease with which potatoes can be stored played a material role in wintering over food supplies prior to the advent of refrigeration, particularly in Europe (Europeans still produce the most potatoes per capita, but the fastest rate of change is in Asia, and China is now the world’s leading producer). As usual, lots of good info here at Wiki, and if you’re really in a potato mood, check out the British Potato Council (how can you not love the Brits for this sort of thing?). The catch is that storage comes at a cost – once the potato begins to decompose, however slowly, the starches that are so essential to its culinary properties begin to break down, and texture and flavor are compromised – so whenever you find truly farm-fresh taters (and you have to ask, even at the farmer’s market – I used to see last-season’s crop for sale at the Union Square market in NYC all the time, when the stalls were otherwise lean), then by all means, you must buy them, and cook them post-haste.
I buy local spuds from several farmers, including Bernier Farms and Love Farms, but I’m particularly partial to the Yukon Golds from Foggy River Farms: On a good day, heaped in their baskets and camouflaged in clods of dirt, they still seem to hold the warmth of the topsoil they were unearthed from, although that seems unlikely, given the cool weather we’ve had. Regardless, hatched from the ground only hours earlier, they are irrefutably gorgeous in their filthy splendor, and an open invitation to make yummy things with hot fat and some fancy salt.
Hot fat, however – and French fries, specifically – present the home cook with a few obstacles, notably deep-frying (messy, dangerous, and requiring special equipment), and health (fat, fat, and more fat; although I’m not really very concerned with fat per se, the health issue having more to do with the types of fat and total calories consumed rather than the percentage or grams of fat in isolation, it’s still the case that anything I pull from a fryer is headed for my belly). Inspired by Heston Blumenthal’s approach to oven-roasted potatoes, I’ve been experimenting with “oven fries” for years now, with both greater and lesser success, and I’ve now convinced myself that a good – no, an excellent – oven fry is possible, even likely, with relatively little effort, and not much guilt on the health front.
Oven Fries

  1. Start with proper potatoes. If you’re going to go the trouble, and bear the caloric consequences, of making and eating home-made fries, surely it’s worth a good potato. Most important is that the potato be of the waxy variety, and ideally fresh from your favorite local grower’s patch of dirt. My go-to waxy potato is the Yukon Gold, great flavor, texture, color, and you can almost always find them.
  2. Pre-heat the oven to 450F and boil a pot of salted water that is large enough to accommodate all the fries without crowding. (If you don’t know how to salt water, go with the Italians’ advice for pasta: It should taste about like the sea – this works for pasta, vegetables, whatever.)
  3. While everything else is getting hot, proceed to wash, peel and then cut the potatoes into roughly rectangular shapes, dropping the cut fries into a large bowl of cold water. You will waste a bit, but reserve the trim; we’ll use the trim in the cooking, and it’s vitally important to start with the right shape: A bit oblong is fine, as length is not so critical; what is essential is that the four “sides” of your potato are parallel, so that you can subsequently cut it into fries of uniform thickness. Cut the potatoes into planks of uniform thickness, typically 5-10mm per side; I like about a 1/4″, but, while this is a matter of preference and aesthetics, cooking times and temps must be adjusted. Take the planks and stack them and cut them into sticks of width equal to their height – this will give you nice fries of uniform thickness, a pleasing square shape, and – most importantly – equal cooking time. As you cut the sticks, drop them into a bowl of cold water; this will help rinse starch off their surfaces and prevent them from sticking together.
  4. Wrap the trimmings in cheesecloth and drop it into the boiling water and dump the potato sticks into the boiling water for long enough to blanch – carefully! Use a slotted spoon or something to avoid splatter – and cook for about 5 minutes. 5 is my number, for my size fry (pictured); it will vary, from 3-8 minutes or so, so you need to watch them. They should come out just barely tender, but not at all falling apart – if they don’t ‘bend’ at all when you pluck one out, they’re not ready; if they start breaking or fail to hold their clean-cut shape, they’re over. This step is critical: There is no such thing as a decent fry that has been cooked only once. There is no short cut. You can use water, as I do here, instead of oil (not quite as good, but still quite good, and much healthier, easier, less messy, and safer at home), but you MUST blanch them before frying, or your fries are destined to suck. Seriously. It has everything to do with giving the starch molecules in the outer layer time to glue together before frying, which is what creates a crisp crust and a flaky interior. The chemistry is unforgiving on this, you can take my word for it, consult McGee, Corriher, or this excellent discussion from the French Culinary Institute, or you can eat shitty fries.
  5. Gently – gently – drain, rinse, and pat-dry the potatoes (laying them out on a kitchen towel which you then fold over works well). Transfer to a large bowl and coat them liberally with good-quality olive oil. When in doubt, keep it local – I’m still working through the bottom of a bottle of TJ’s Spanish EVOO, but I’d prefer to have used DaVero’s 40-weight. And when I say liberally, I mean it, now is not the time to skimp on fat. The fries should be coated and glistening with oil.
  6. Transfer to a sheet tray, moving the fries around to ensure that they all have room to breathe. Don’t “crowd” the tray! Transfer the sheet tray to the 450-degree oven and bake for about 20 minutes. Watch, listen, and check them frequently from 15 minutes on, but I suspect you’ll find about 25 minutes total cooking time.
  7. Take them out and salt the hell out of them. Nothing worse than a bland, under-seasoned french fry. Kosher salt is a staple around here, but sometimes it doesn’t stick to fries very well, so a finer grind of good sea salt, or – better – one of the more powdery sel gris would really make them sing.
  8. Serve IMMEDIATELY! Heinz (and no other) ketchup, or – better – a home-made aioli, would be unimpeachable, but is purely optional.

Good vittles…