


This is a guest post by Crissi Dillon from SantaRosaMom and 707. She’s been inspiring me to try my own hand at kombucha, and gave me my first baby scoby. If you’ve been thinking about trying your own hand, here are some great instructions based on her own trial-and-error and research. Good luck!
++++++++
I hopped on the kombucha boat a little late in the game in an effort to combat the cold season blues that were sapping me of all my energy. I’d heard about the pro-biotic and energy-inducing quality of kombucha, and was totally intrigued. However, fermented tea hardly sounded delicious. I’m not exaggerating when I say I had to find courage to purchase a bottle of it at Whole Foods and take my first sip.
I’m also not exaggerating when I say it had me at ‘Hello’.
The stuff was delicious, and I was instantly hooked. I read somewhere that those seeking the health benefits of kombucha should drink it every day. But after my 4th day and $12 later, I realized this was hardly healthful to my bank account. So I began reading up on ways to make my own tea.
There are several ways you can go when embarking on the Kombucha adventure.
– You can buy a kit that includes a Kombucha scoby. These are found on various sites and generally include a scoby, organic sugar, organic tea, and a jar for anywhere from $20-$50.
– You can beg a friend to let you have one of the baby scobies and some residual kombucha to help boost it along.
– You can create your own scoby using one of those $3 kombucha drinks, just like the blogger at PaprikaHead.com shared in a blog entry (and who was responsible for starting my own brewing adventure).
A little Kombucha terminology lesson…
Kombucha: Sweetened tea that has been fermented by a scoby
Scoby: A mushroom-like rubbery substance of bacteria and yeast that floats on top and ferments the tea.
Mother: The part of the scoby that is actually fermenting the tea, located at the bottom of the scoby.
Baby: Layers of scoby that grow on top of the mother scoby that can be separated between brewing cycles.
Assuming you have a healthy scoby on hand from any one of these measures, brewing kombucha is actually incredibly easy to do:
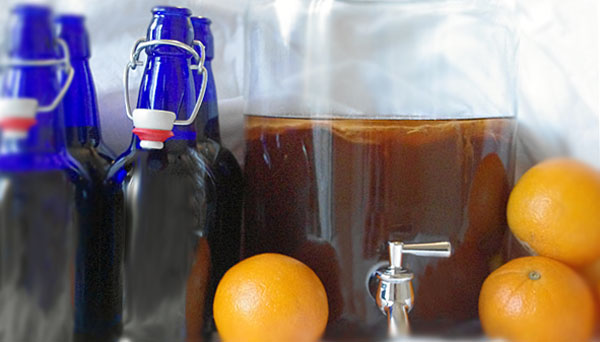
A. Starting out, place your scoby and at least 1 cup kombucha in a large jar (I use a drink dispenser that I found at Cost Plus for only $15).
B. Heat 12 cups of water to boiling. Once it’s boiling, add 1 cup of sugar and let boil for 5 minutes more until the sugar has dissolved. Remove from heat and add 4 organic black tea bags. Let cool completely to room temperature. Add to the scoby in the large jar and then cover with a piece of cloth or paper towel, secured by a rubberband. This allows the drink to breathe while keeping out potential fruit flies. Place in a cool, dark area and forget about it for 7 days (I keep mine on top of the refrigerator).
C. After 7 days, taste-test a small portion. It should have a slightly sour taste with a bit of effervescence. If it still tastes sweet and flat, let it sit for another day. Repeat every day until it’s achieved the desired fermented state. Bottle the kombucha by placing it in separate airtight bottles (I found some beautiful blue bottles with swing top caps at The Beverage People at 840 Piner Rd #14, Santa Rosa), or in a large airtight container. Notice the theme: airtight. This allows bubbles to build up in the tea. Once bottled, you can start the brewing process all over again, adding a cup of reserved kombucha from this batch and repeating the directions to create the sweetened tea for brewing.
Now for the things everyone should know about brewing kombucha:

1. Cold stops the fermenting process, heat activates it. If your kombucha is at the desired taste and effervescence, store it in the refrigerator. If you wish it to become more bubbly or sour a bit more, keep it out. I will usually keep the brewed kombucha out of the fridge for a day or two so it can become more bubbly, and then store it in the fridge to ensure it remains sweet.
2. Allow your brewed kombucha to breathe. Kombucha builds up a lot of pressure in airtight bottles, making them naturally bubbly. It can also create so much pressure that the top of the bottle will fly off and cause serious damage. If you are storing kombucha outside of the refrigerator, open the top every couple of days to relieve the mounting pressure.
3. Teas you should use: Organic teas are actually best for the process as there is nothing in there that can harm the scoby. Teas should be free of oils, so Earl Grey tea is out. And the teas need to have caffeine to properly feed the scoby. The best teas to use are black or green teas. Black tea creates a stronger tea, green tea creates a milder tea with more bubbles. I’ve heard of many combining the two types of tea bags to create a strong and bubbly tea.
4. Drink water! I learned the hard way how dehydrating kombucha can be. Actually, it’s the tea that saps the system of water. So make sure you are getting in plenty of water when drinking kombucha to avoid any signs of dehydration.
5. Start out slow. Because of the pro-biotic qualities of kombucha, it can cause…bathroom issues. Let’s just say that it sweeps out all the toxins in your body very effectively. So start with a small glass of kombucha every day and increase it as your body gets used to it.
6. Be kind to your mother. I’m not joking about this. Weeks into brewing some very successful kombucha tea, a friend of mine came to my house and spied the jar of fermenting tea on my refrigerator. She then proceeded to make fun of the mother scoby mercilessly, slamming the way she looked and how the tea probably tasted. Days later when it was ready to brew, the tea tasted so much like vinegar I had to throw it out. I gave my mother extra love the next brewing session, and in return, my happy mother gave me the best tasting kombucha yet.
7. Only brew kombucha in glass. Metal and plastic don’t react well with the fermenting properties of kombucha, and ceramic with lead can seep into the liquid. Under the same token, do not let metal touch your scoby at all – including metal spoons. If you must use a utensil, I suggest using a wooden spoon.
8. Keep things clean! If you’re going to handle the scoby in between brewing, make sure your hands are clean. Better than using soap, use apple cider vinegar to rid your hands of dirt and oils to make them safe enough to come into contact with the scoby. And when you are done handling the scoby, wash your hands again. Make sure all your brewing equipment is sanitary to ensure your scoby doesn’t grow mold. If any mold starts forming on your scoby at all, you must throw out the whole batch and scoby and start all over again.
9. Flavoring your kombucha. I prefer just plain kombucha, but some people like to add different fruits and juices to their tea. All flavoring should be added after the drink has been bottled and not to the fermenting kombucha with the scoby. Different flavors can widely vary and depends on your taste. My personal favorite is to add a few pieces of mango and some grated ginger to the bottle. Another favorite is a little pineapple juice, coconut water, and coconut extract to create a piña colada kombucha. Experiment with different juices and fruits to create a taste you’ll love.
10. Share the wealth. Every cycle of brewing will create a new baby scoby on top of the mother. Left untouched, the layers quickly add up. But these layers are actually baby scobies that can be passed on to others who wish to start brewing their own kombucha. Separate the layers (don’t be afraid, the scoby won’t bite), add it to a cup or two of reserved kombucha, and pass it on.
Want to cook up a batch like Crissi? Share your kombucha adventures and wisdom in the comments.